


Years ago, my aunt introduced me to kombucha and I LOVED it. In the last few years, I’ve started consuming a lot more kombucha because of how good it is for your gut, but buying individual bottles of it got to be SOOO expensive, and it sucked spending that much when I got a flavor I didn’t care for. For my birthday last year, I asked for this kit (http://amzn.to/1lB0aYV), and my mom came through! I was able to start experimenting with the brewing process and flavorings.
Once you get your kit, you have to go online and enter a code that’s in the box and you will receive your “scoby”, which is essentially a yeast cake with some kombucha starter that is used in the fermentation process, within a few days. This is what mine looked like:
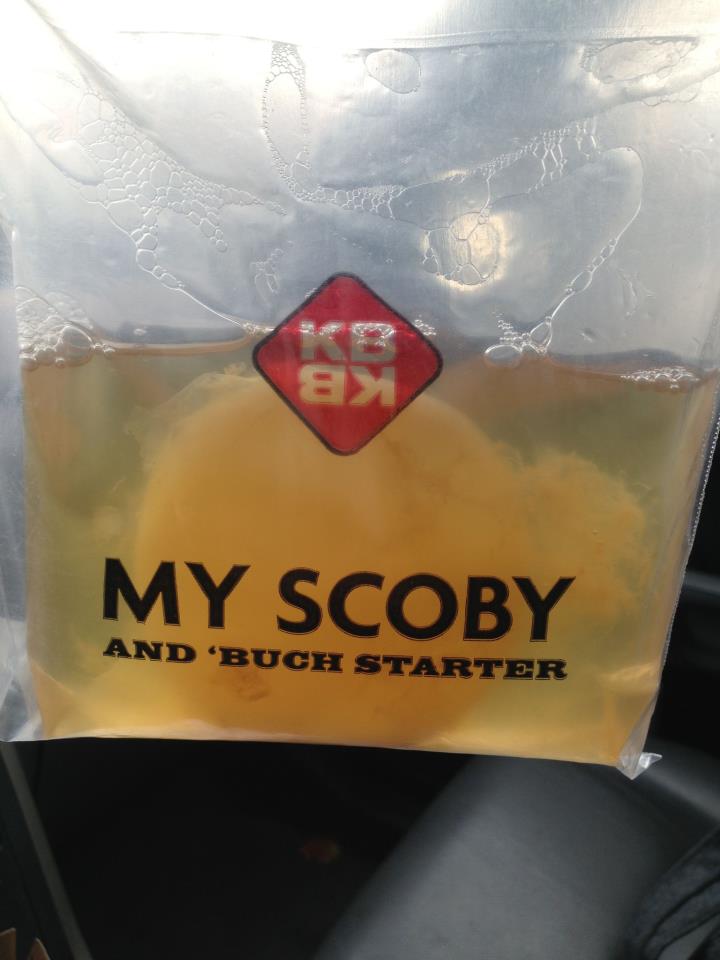
Kind of looks like a breast implant, huh? Anyway, now that you have a scoby, it’s time to brew! The first time you make kombucha, it’s like baking a cake with a mix…everything is in the box, you mix it, follow directions and you’re done. But once you get the idea, you start to experiment. The following is how I make my kombucha now–and everyone agrees that this is the best kombucha I’ve made!
1. In a large pot, bring 4 c. water to a boil. Once boiling, turn off stove.
2. Steep 6 organic tea bags in hot water for 20 minutes. I use this tea: http://amzn.to/Py0bll which is a combination of hibiscus, linden flower and chamomile. It’s actually a kid’s “nighty-night” tea and is decaffeinated.
3. Remove tea bags and stir in 1 c. organic sugar (I use this one: http://amzn.to/1ehLZm4), allowing to dissolve. Note: you MUST use the entire amount of sugar, as the scoby will feed off of this in the fermentation process and aids in carbonation. Do NOT use honey, as honey has antibacterial properties and can kill your scoby.
4. Add 1/2 gallon cold water to the tea mixture, and transfer the entire mixture to your fermenting jar. Once the tea mixture has cooled to below 90 degrees, add your scoby and the starter that your scoby is floating in. Cover the jar with fabric and secure with a rubber band.
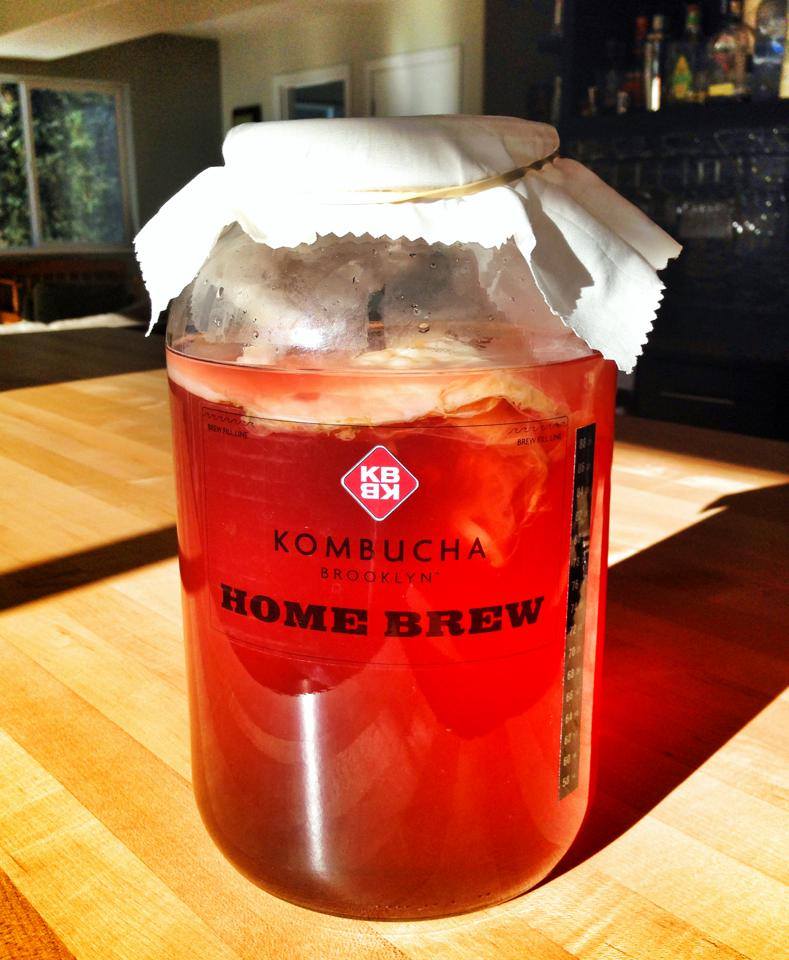
5. Keep the jar in a location that has a stable, warm temperature, preferably between 72-80 degrees. Also keep the jar out of direct sunlight; if you want the brew to ferment in a place with lots of natural light, just wrap it up in a towel so the brew is out of daylight, but still keeping the top able to breathe.
6. In about 7-14 days, your scoby will form a “baby” at the top of the jar. Sometimes it looks thick and creamy, sometimes it looks clearish and gelatinous. Don’t worry–this is normal! After a few days, taste your brew (I stick a straw down into the jar to extract a sample, which won’t contaminate the brew) every few days until is reaches the right “pucker power” for you.
Stay tuned for information on how to do your second ferment, and don’t forget to follow me on Facebook: www.facebook.com/GFAFRecipes
Disclosure: Some of the links in the post above are “affiliate links.” I am a participant in the Amazon Services LLC Associates Program, an affiliate advertising program designed to provide a means for sites to earn advertising fees by advertising and linking to amazon.com. Regardless, I only recommend products that I use personally and love.
 Follow

Comment & sign up for emails