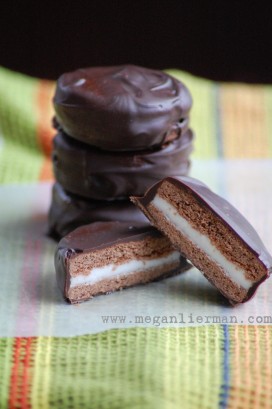


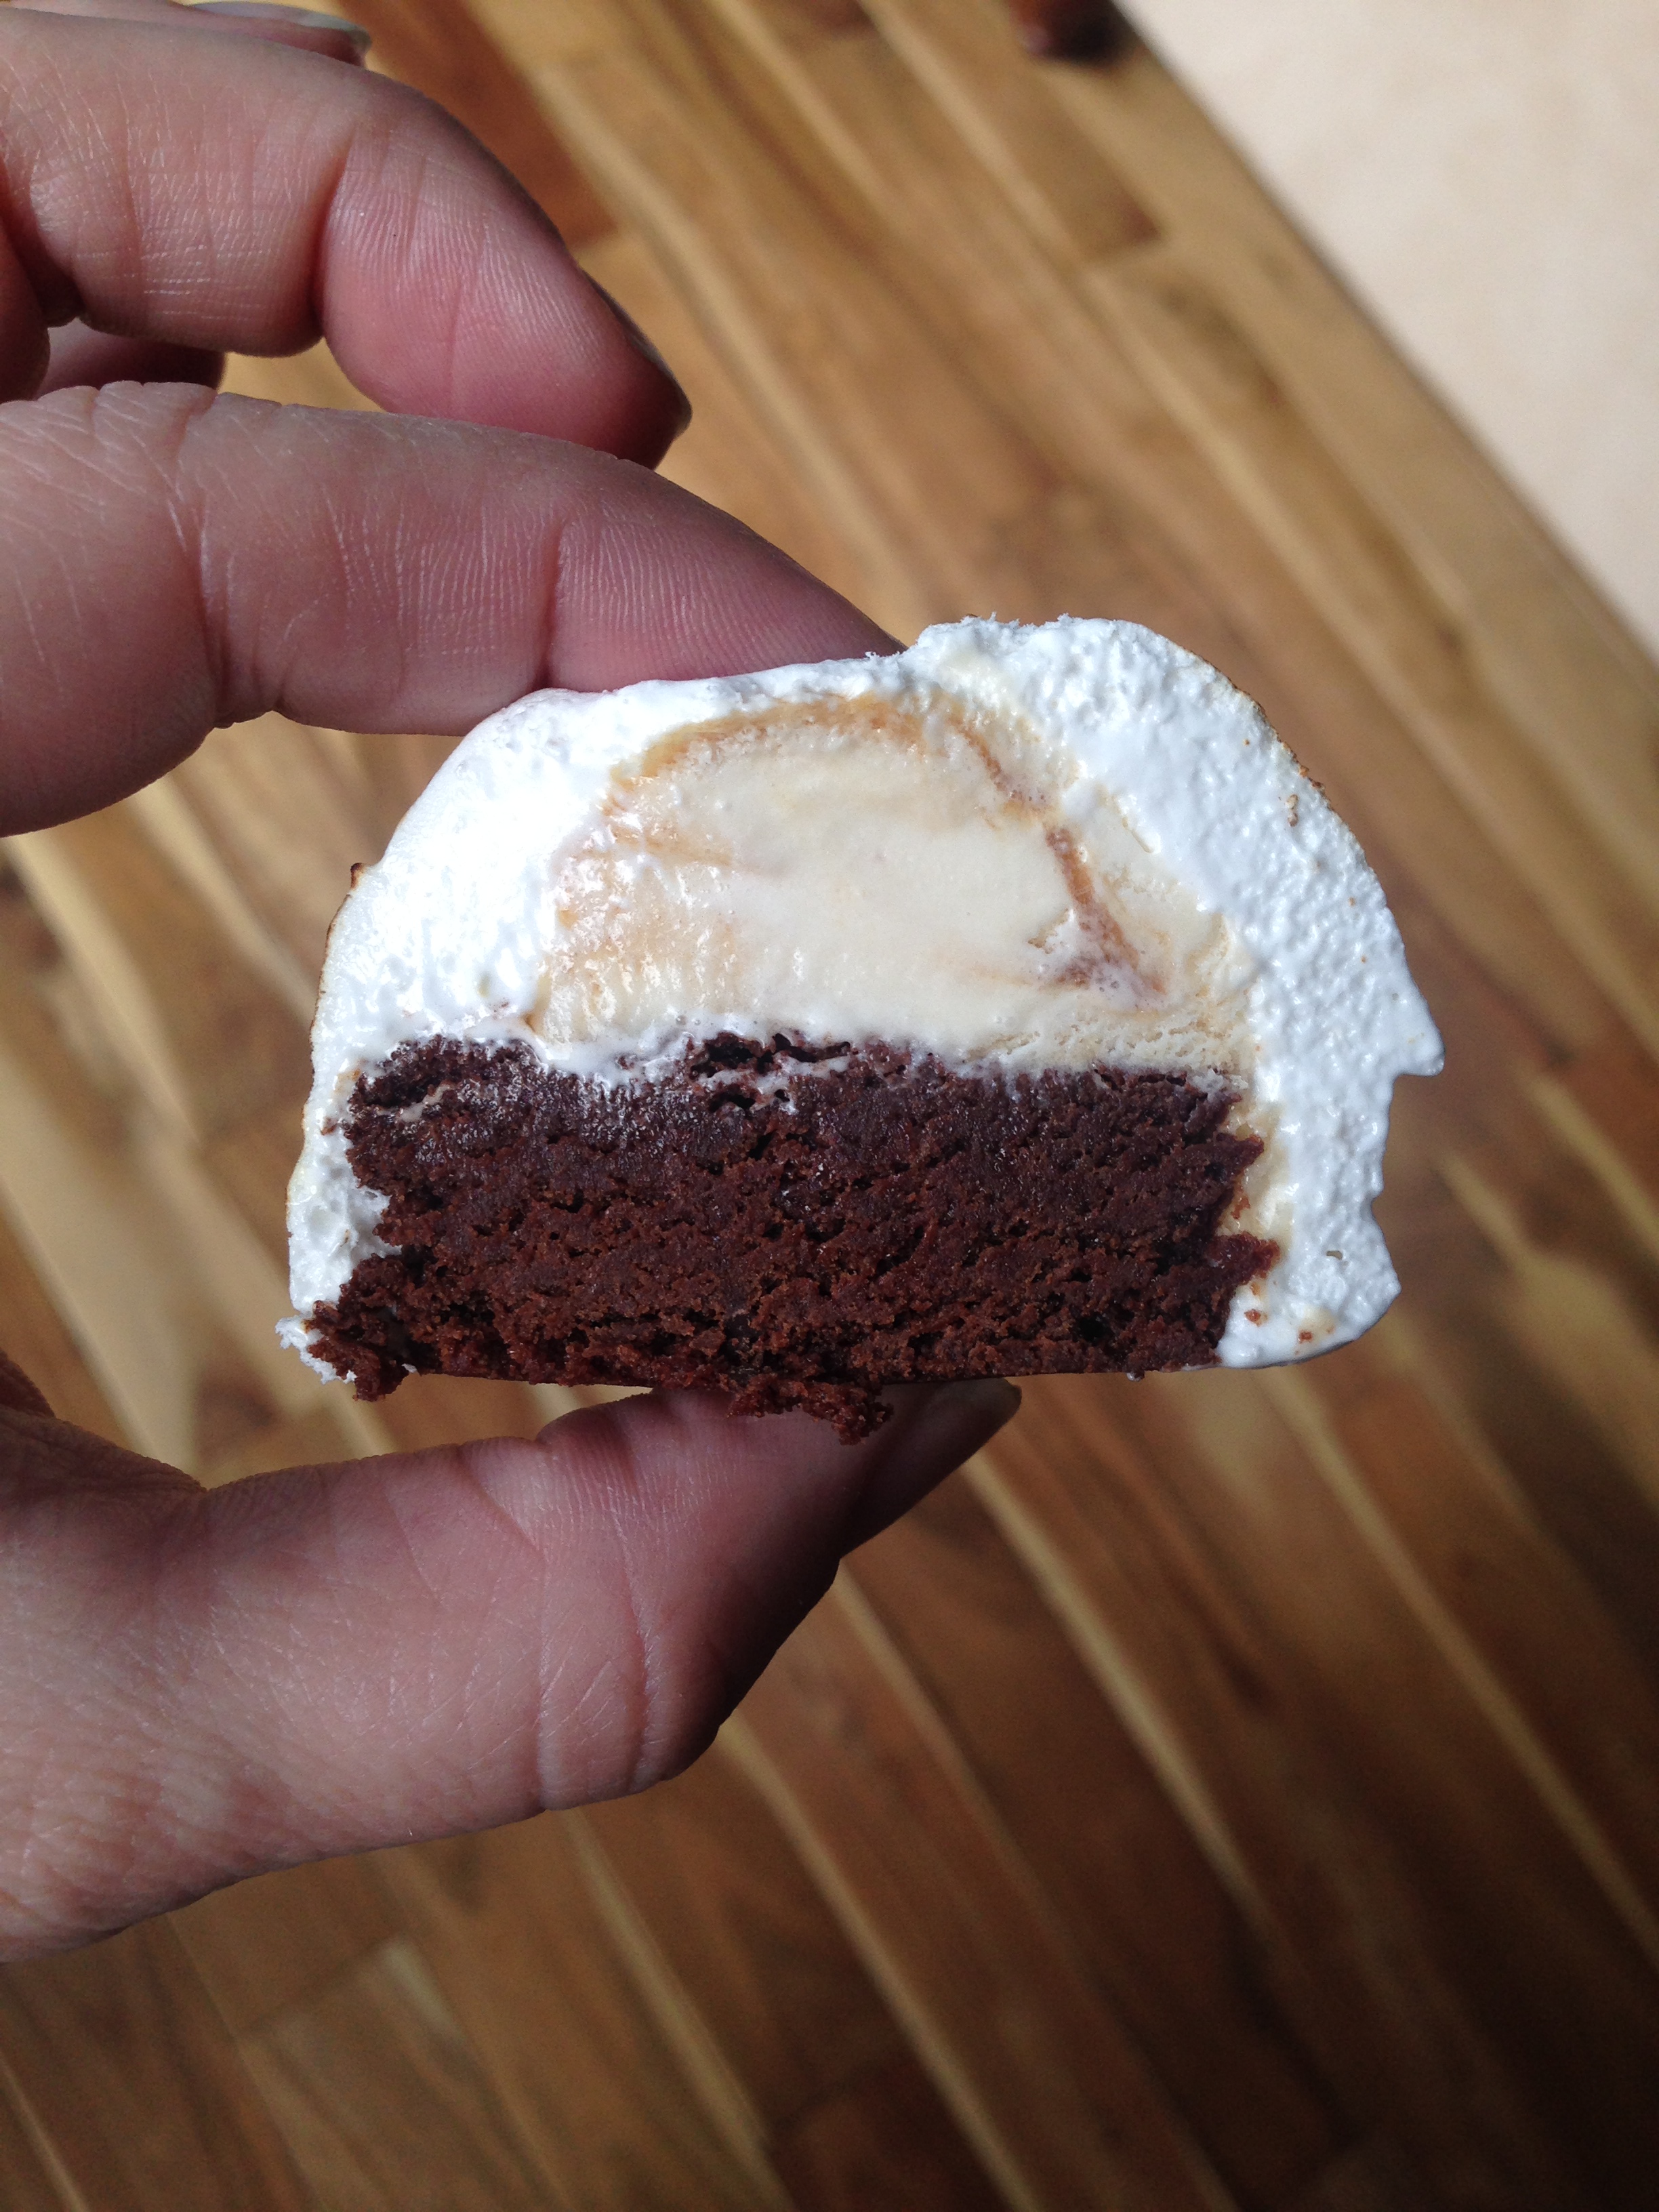
Many of you might wonder what “Baked Alaska” is. In a nutshell, it’s a brownie or cake base, topped with ice cream, wrapped in a fluffy meringue that is then toasted with a kitchen torch. To be honest with you, I’m not sure why it is even called Baked Alaska, except that the little mounds sort of look like little igloos (because all of us up here in Alaska live in igloos!). I’ve only eaten Baked Alaska once in my life, but when one of our friends said they wanted mini Baked Alaska for dessert, I had to accept the challenge! I mean…how hard could it be?! Note: it seems intimidating, but it really isn’t that hard!
Ingredients:
One batch of my gluten free (dairy free!) triple chocolate brownies
One carton of ice cream of choice
Meringue Ingredients:
1 c. sugar
4 oz. light corn syrup
2 oz. water
4 egg whites at room temperature
1/2 tsp. vanilla extract
pinch of salt
1. Make batch of brownies as indicated in recipe. Cool and cut with 1 1/2″ – 2″ diameter cookie cutters. Place brownies in a dish or rimmed baking sheet.
2. Scoop one nicely rounded scoop of ice cream and put on top of each brownie. Put pan into freezer to allow brownies and ice cream to harden a bit. (This can be done the day before you plan to serve the dessert)
3. Make the meringue: combine the sugar, corn syrup and water in a medium pot and place over high heat. Stir just until the sugar dissolves, about 5 minutes. Clip on a candy thermometer and bring the mixture to 240 degrees F.
– While the syrup is cooking, place the egg whites, salt, and vanilla into the bowl of a stand mixer and, using the whisk attachment, whisk the eggs on high speed until they reach medium peaks, 4 to 5 minutes.
– When the sugar mixture reaches 240 degrees F, remove from the heat and, with the stand mixer on low speed, slowly and carefully pour the syrup in a thin steady stream into the egg white mixture, DO THIS CAREFULLY AS THE MIXTURE IS VERY HOT AND WILL GIVE YOU ONE HECK OF A BURN IF IT GETS ON YOUR SKIN! (This hot sugar mixture basically cooks the eggs so you don’t have to worry about salmonella.) Once all the syrup mixture has been added, increase the mixer speed to high and whisk until stiff peaks are formed and the mixture has cooled, 8 to 10 minutes.
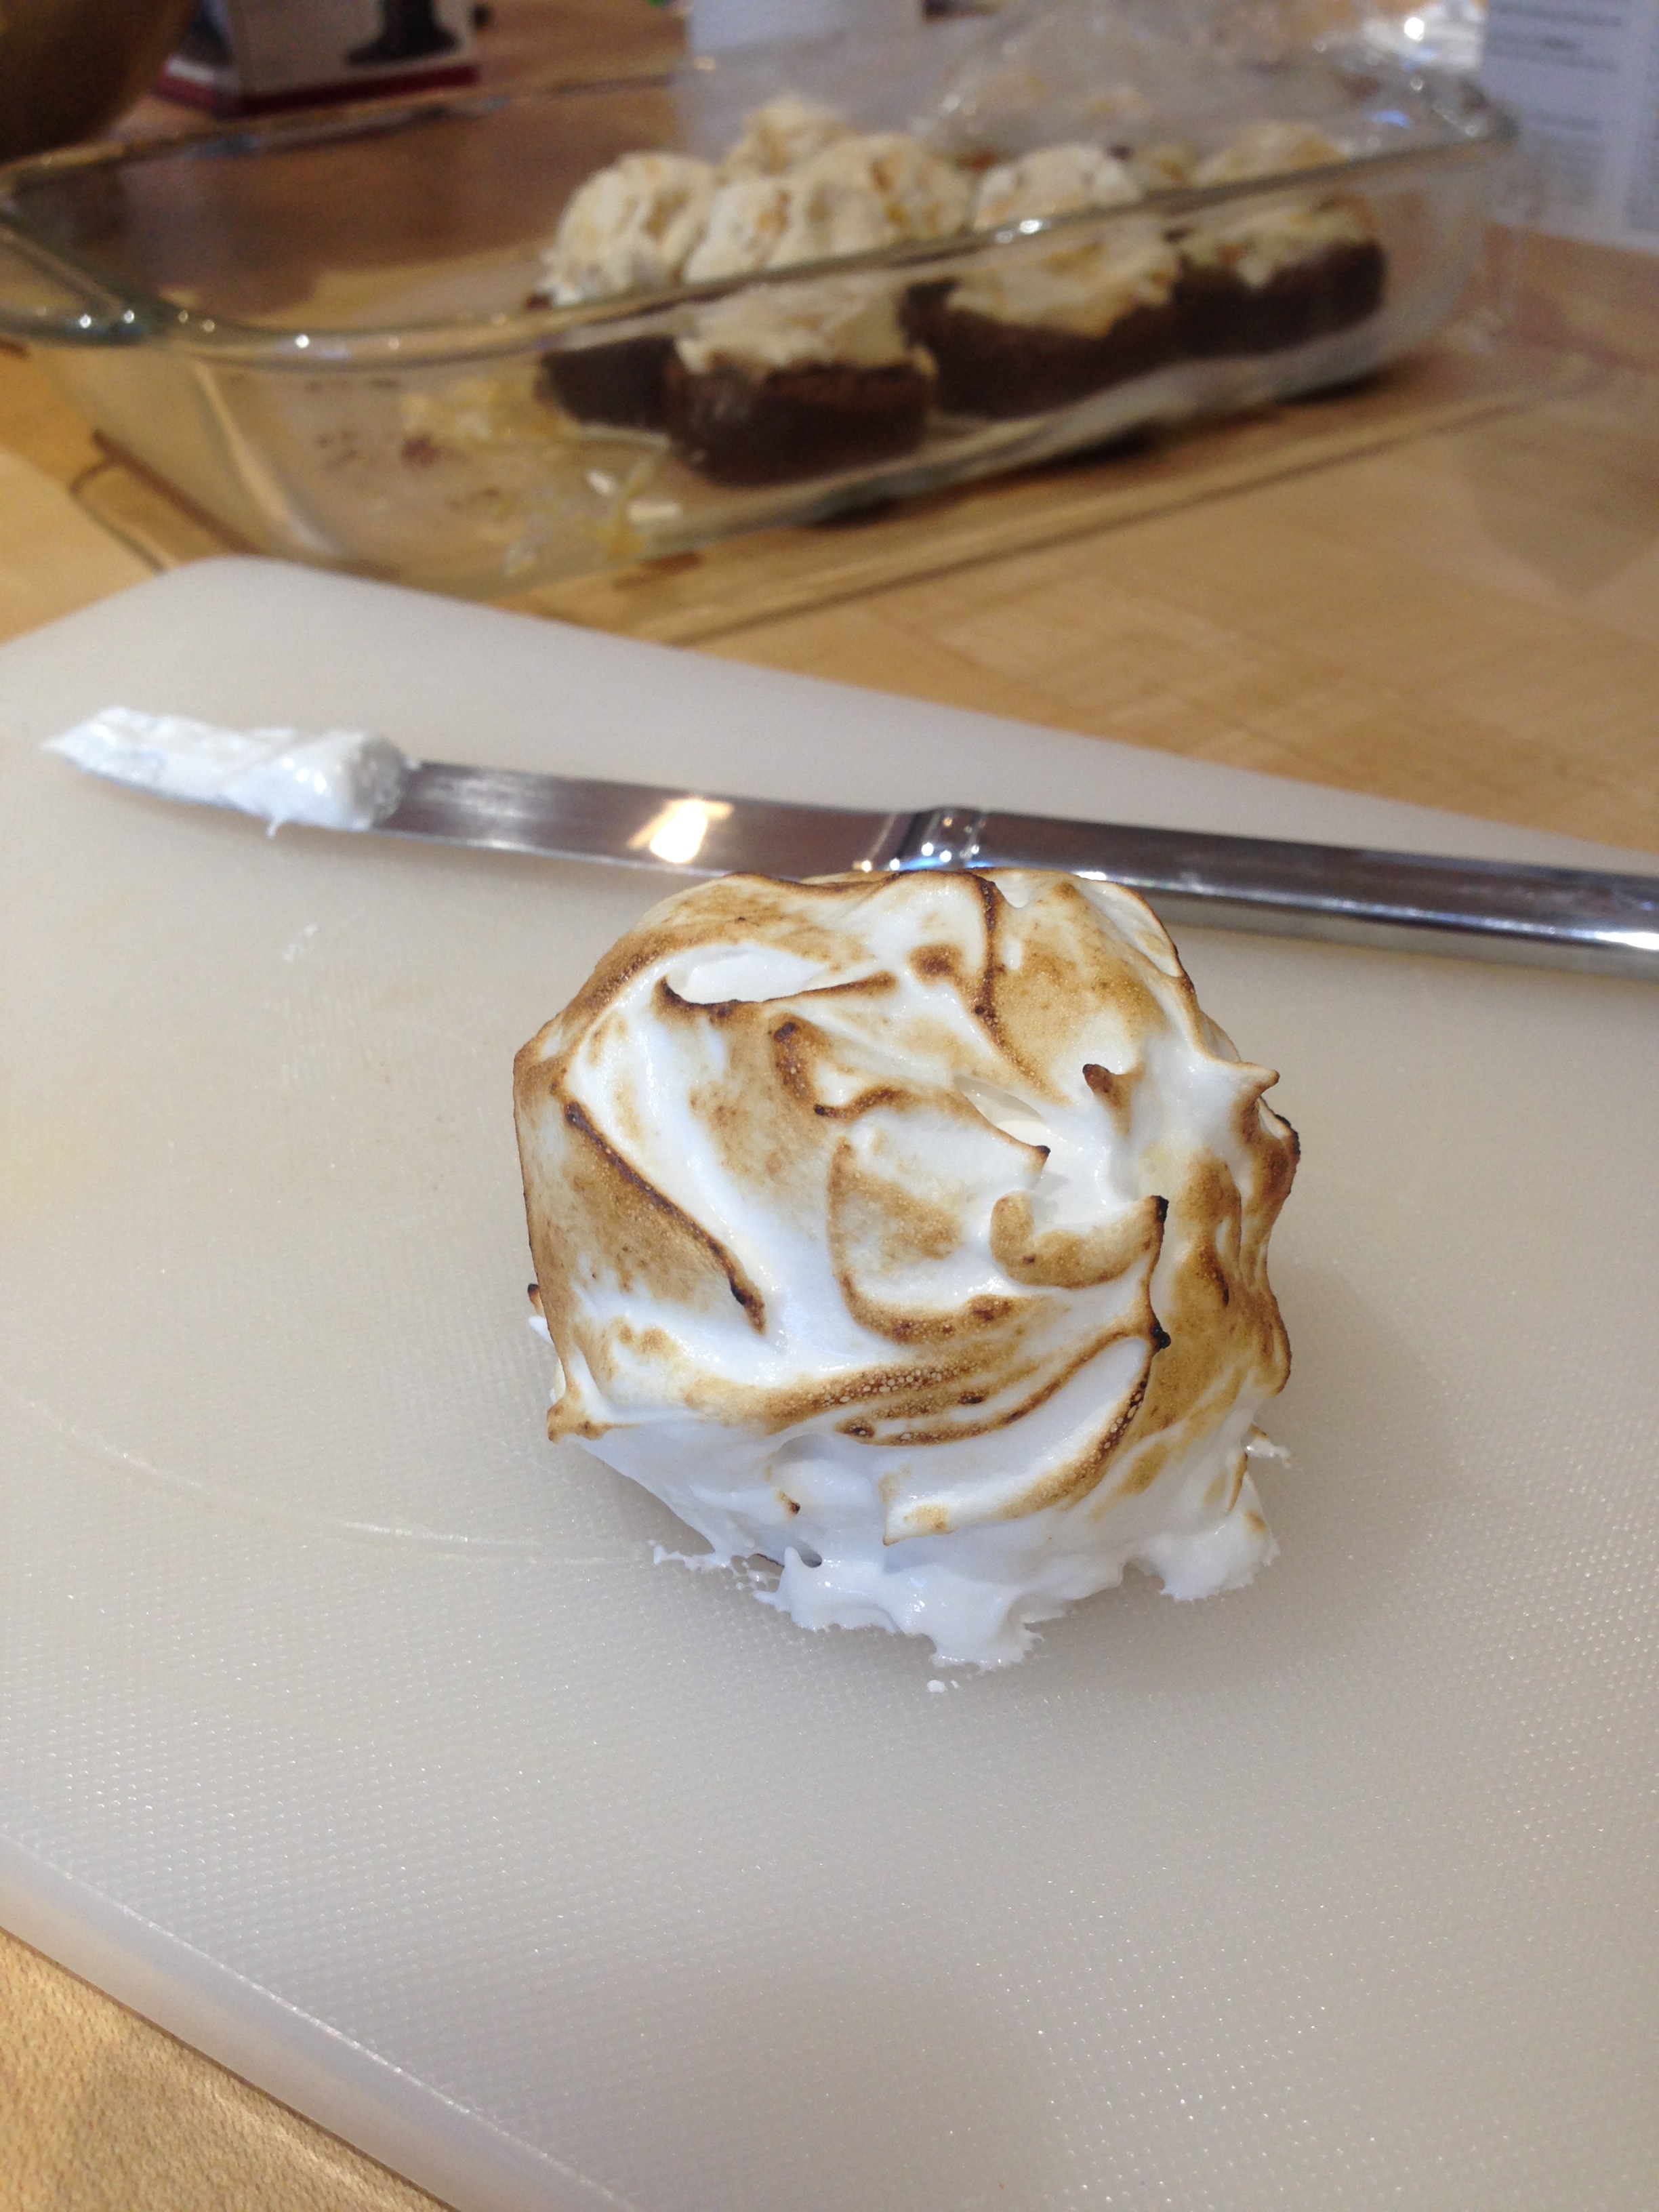
4. Take the brownie/ice cream tray out of the freezer. Working quickly, take a knife and evenly spread meringue over the entire brownie/ice cream, making sure the meringue is at least 1/4″ thick. Swirl the meringue around a bit as the peaks will get toasted and add some nice texture and pattern.
5. Fill a kitchen torch according to the manufacturer’s recommendations (I have this torch; make sure you get butane!) After covering each dessert with meringue, torch it lightly on all sides so you get a nice toasted finish, being careful not to burn the meringue. (Keep in mind that the meringue is a lot like marshmallow cream)
Disclosure: Some of the links in this post are “affiliate links.” I am a participant in the Amazon Services LLC Associates Program, an affiliate advertising program designed to provide a means for sites to earn advertising fees by advertising and linking to amazon.com. I never recommend products that I don’t actually use and love.
 Follow

Comment & sign up for emails